Hosted by site sponsor WebMate.
Unibody MacBook Pro Q&A
Update Published May 11, 2016
All Mac Q&As >> Unibody MacBook Pro Q&A | Also See: All MacBook Pro Specs
To be notified of new Q&As, sign up for EveryMac.com's bimonthly email list.
How do you upgrade the hard drive in the 17-Inch "Early 2009/Unibody" MacBook Pro?
Please note that this Q&A is up-to-date and covers the "Early 2009 Unibody" MacBook Pro models. EveryMac.com also provides hard drive upgrade instructions for later "Unibody" MacBook Pro models released between "Mid-2009" and "Mid-2012."
Upgrading the hard drive in the 17-Inch "Unibody" MacBook Pro -- the MacBook Pro "Core 2 Duo" 2.66 17-Inch (Early 2009/Unibody) -- is quite easy, just about as easy as upgrading the RAM.
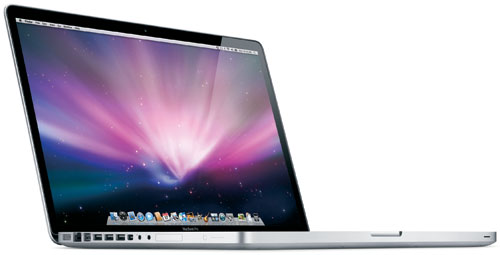
Photo Credit: Apple, Inc. (Early 2009/Unibody MacBook Pro, 17-Inch)
Identification Help
If you're not sure whether or not you have a 17-Inch "Early 2009" MacBook Pro or another model, these models can be most readily identified externally via EMC number 2272 on the bottom of the computer. In software, they can be spotted by the MacBookPro5,2 model identifier (although the 17-Inch "Mid-2009" MacBook Pro models also share this identifier, they use the same type of RAM and have the same maximum capacity).
These models also can be identified by the serial number using EveryMac.com's Ultimate Mac Lookup feature.
Official Hard Drive Upgrade Instructions
Apple covers how to replace the hard drive in the "Early 2009" 17-Inch MacBook Pro in pages 37-44 of the 17-Inch "Unibody" MacBook Pro User Guide (PDF). This likely will provide much of what you need to replace the stock hard drive with a larger one.
The support document starts by noting that:
The hard disk drive is located next to the built-in battery when you open the back of your MacBook Pro. The replacement drive must be a 2.5-inch drive with a Serial ATA (SATA) connector.
It continues with detailed instructions, complete with drawings, which should be read in their entirety before one replaces the hard drive.
However, the basic procedure is to turn off the notebook, disconnect cables, and let it cool; flip it over and unscrew the ten screws (of differing lengths) that hold the bottom plate in place, remove the bottom plate, discharge static electricity, unscrew the drive bracket, disconnect the SATA connector, remove the old drive and install the new one, and reassemble the computer.
It's really quite easy with video instructions.
Hard Drive Upgrade Video Instructions
The Apple-provided drawings are helpful, but even better, site sponsor Other World Computing provides a convenient step-by-step video of the process:
After watching this video, it should be apparent that upgrading the hard drive in the 17-Inch "Unibody" MacBook Pro is easy. However, if you do not feel comfortable -- or have the time -- to perform the upgrade yourself, hiring a professional always is a good plan.
MacBook Pro Storage Purchase Options
In theory, just about any hard drive or SSD that meets the minimum requirements should work in this 17-Inch MacBook Pro. However, it always is best to buy from a trusted company with Mac knowledge for the most trouble-free experience.
In the US (and many other countries), site sponsor Other World Computing sells storage upgrades in addition to memory for the MacBook Pro models (and all other Macs as well).
In the UK and Ireland, site sponsor Flexx sells MacBook Pro compatible hard drives and SSDs with free shipping. The company provides flat rate shipping to France, Germany, and Switzerland and inexpensive shipping for all of Europe, too.
Also see:
- How do you upgrade the RAM in the 17-Inch "Early 2009/Unibody" MacBook Pro? How much RAM of what type does it support?
- How do you replace the optical drive in the "Unibody" MacBook Pro models with a hard drive or SSD? Is it possible?
Permalink | Report an Error/Typo | Sign Up for Site Update Notices
<< Unibody MacBook Pro Q&A (Main) | Also See: All MacBook Pro Specs
Established in 1996, EveryMac.com has been created by experts with decades of experience with Apple hardware. EveryMac.com includes, and always has included, original research incorporating detailed, hands-on inspection of packaging, computers, and devices as well as extensive real-world use. All information is provided in good faith, but no website or person is perfect. Accordingly, EveryMac.com is provided "as is" without warranty of any kind whatsoever. EveryMac.com, and the authors thereof, shall not be held responsible or liable, under any circumstances, for any damages resulting from the use or inability to use the information within. For complete disclaimer and copyright information please read and understand the Terms of Use and the Privacy Policy before using EveryMac.com. Copying, scraping, or use of any content without expressed permission is not allowed, although links to any page are welcomed and appreciated.